Before I take the wood to the band saw I start by making rough cuts with a circular saw. First I used my fine-tooth blade to cut a piece for the box back out of 3/8 inch plywood. This is my daughter helping me.
Next I rough cut my arch and pillar pieces. One 4ft by 4ft piece of plywood is enough to make two of these. My husband is watching from the other side to make sure I stop the cut in the right spot.
Once the pieces are rough cut, I can take them to the band saw and do the precision work.
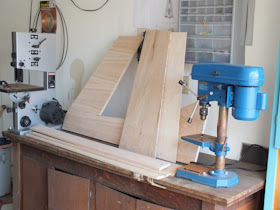
Believe it or not, here's all the wood, rough cut, that I need to make a harp:
Pages
▼
Tuesday, August 6, 2013
Sunday, August 4, 2013
Harp No. 7
The first step in designing and building a harp is... designing it. This time I'm using the computer. Oh how I love those bezier curves. It's a snap to tweak it here and there until it looks just right. I also like being able to accurately space the strings, then with a click and a drag adjust their angle with the sound box until I like the shape of the harmonic curve along the top. Back when I did this by hand I had to re-draw everything if I wanted to try a different angle.
After I've got the design ready, I can print it out, actual size, on multiple sheets of paper. Then I tape it together and trace the arch and pillar onto my sheet of plywood.
I cleaned up the workshop today and should be ready to start cutting on Monday.
After I've got the design ready, I can print it out, actual size, on multiple sheets of paper. Then I tape it together and trace the arch and pillar onto my sheet of plywood.
I cleaned up the workshop today and should be ready to start cutting on Monday.


