Thursday, October 31, 2013

Halloween Ghost Omelets

I know most of you on the mainland had breakfast hours ago, but maybe you'd like to try this idea for next year:

GHOST OMELETS
 These are super fast and easy. All you need is:
  • Two eggs per person
  • One and a half circular-shaped slices of lunch meat per person. We used ham, but Canadian bacon, summer sausage, or even bologna would work.
  • Your favorite shredded cheese
  • Butter or margerine
  • Salt and pepper
Directions:

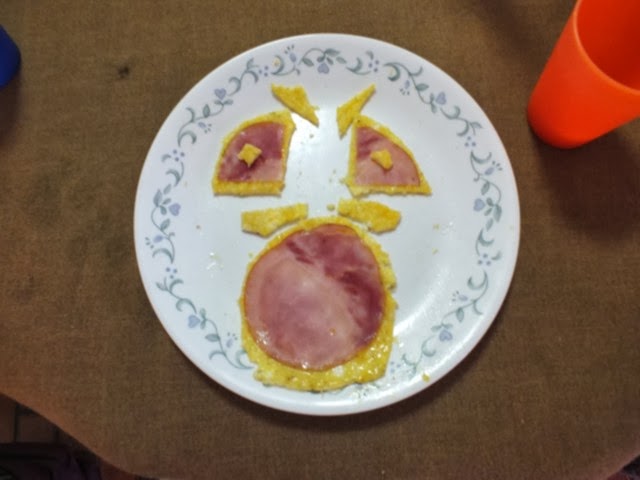
Melt a little butter in a round, flat skillet. Non-stick or well seasoned cast iron works best. Cut a half-circle of lunch meat into two eye pieces. Crack two eggs into a bowl. Add salt and pepper to taste. Whisk eggs with a fork, then pour them onto the hot skillet. Sprinkle with shredded cheese, then arrange eye pieces and a full circle of lunch meat for the mouth. Cook about 2 minutes or until the omelet is firm, using a lid to cover the skillet so that the top side will cook without flipping. Gently slide the cooked omelet onto a plate.
The kids can have even more fun once the ghost omlete is on their plate:
HAPPY HALLOWEEN!

Tuesday, August 6, 2013

Harp No. 7: Rough Cuts

Before I take the wood to the band saw I start by making rough cuts with a circular saw. First I used my fine-tooth blade to cut a piece for the box back out of 3/8 inch plywood. This is my daughter helping me.
Next I rough cut my arch and pillar pieces. One 4ft by 4ft piece of plywood is enough to make two of these. My husband is watching from the other side to make sure I stop the cut in the right spot.

Once the pieces are rough cut, I can take them to the band saw and do the precision work.
Believe it or not, here's all the wood, rough cut, that I need to make a harp:


Sunday, August 4, 2013

Harp No. 7

The first step in designing and building a harp is... designing it. This time I'm using the computer. Oh how I love those bezier curves. It's a snap to tweak it here and there until it looks just right. I also like being able to accurately space the strings, then with a click and a drag adjust their angle with the sound box until I like the shape of the harmonic curve along the top. Back when I did this by hand I had to re-draw everything if I wanted to try a different angle.
After I've got the design ready, I can print it out, actual size, on multiple sheets of paper. Then I tape it together and trace the arch and pillar onto my sheet of plywood.
I cleaned up the workshop today and should be ready to start cutting on Monday.